How to Install OpenCPN on Your AIS Raspberry Pi for Maritime Research
This method works as of 8/25/21
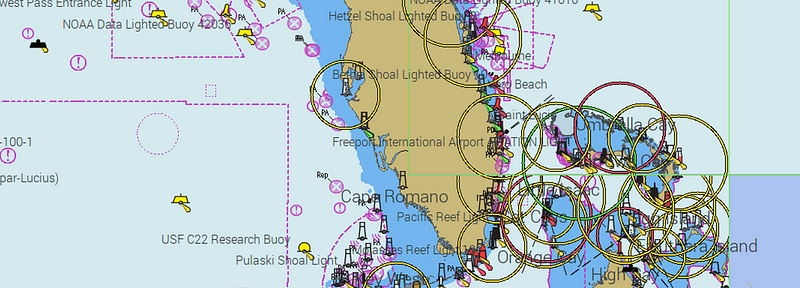
OpenCPN is chart plotter navigation software designed for charting a course and tracking your position on a boat straight from your own device. For my purposes, I installed OpenCPN to track vessels and learn how to research and manipulate AIS. I work a lot in the Maritime OSINT space and regularly see vessels obscuring/changing things such as their identities, locations, and draught and I wanted a deeper knowledge of how that is possible.
In my previous blog, Creating an AIS Pi for Maritime Research, I walked through how to build a Pi with a dAISy Hat and antenna to pick up AIS signals. This is a continuation of that process that will show you how to install the OpenCPN program and begin using your Pi to capture AIS.
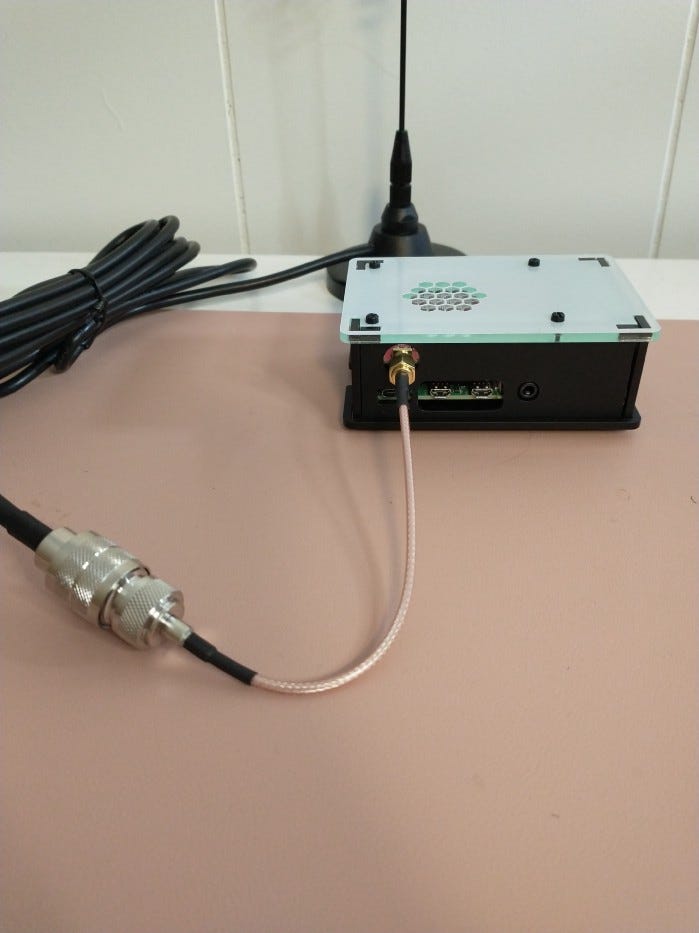
The application found on opencpn.org works on Windows, Mac, Linux, and Raspberry Pi (I am using a Raspberry Pi 4 with Rasbian) and involves three steps: Installing OpenCPN, downloading charts, and setting up GPS or NMEASimulator to track AIS.
Admittedly, I am terrible at using the command line and therefore found the documented installation to be somewhat difficult. You can find the official install instructions here but some of the commands have since been depreciated (apt-key command) causing the installation to fail. I intend to walk through the installation step-by-step including those missing steps.
First, let’s create a PGP key file:
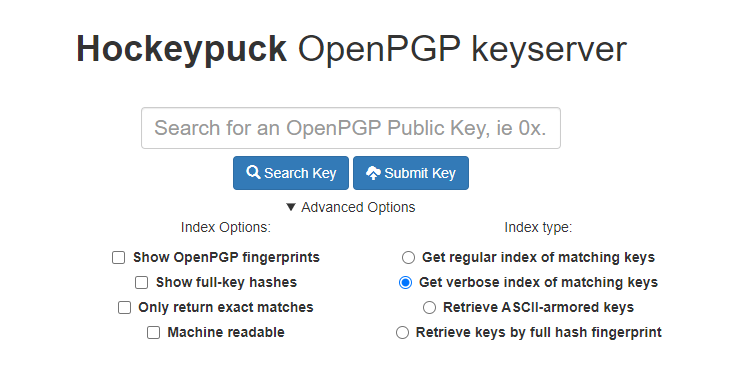
- Navigate to the PGP keyserver
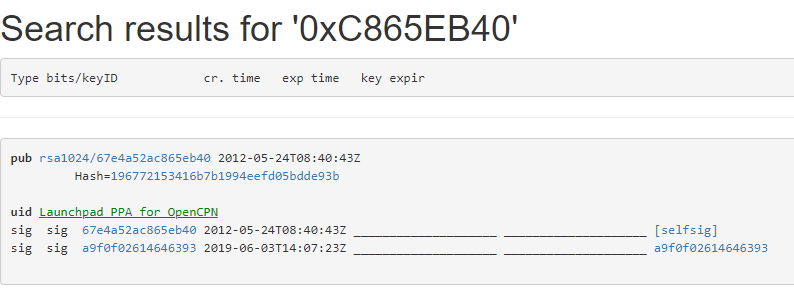
- Enter the key:0xC865EB40
- All options should be turned off except “Get Verbose index of matching keys”
- Click “search for a key”
- Click on the link that is shown beside “pub”
- A new page opens with the PGP key
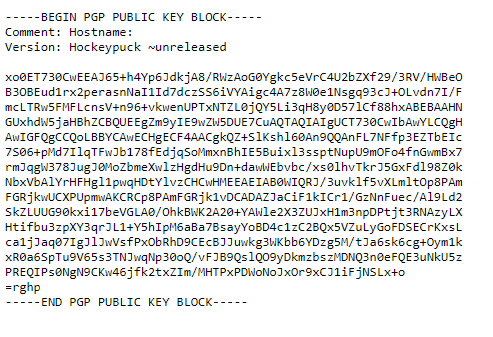
On the Pi, if you haven’t created an OpenCPN directory let’s do that now:
mkdir ~/opencpn
cd ~/opencpn
- In your opencpn directory create a text file named opencpn_key
- Copy the PGP key from “ — -BEGIN PGP PUBLIC KEY BLOCK — -” to the end and paste it into your new text file. Save and close.
nano opencpn_key.txt
- Run the following command to verify that the file is actually a PGP key.
file opencpn_key.txt
Next, download and install OpenCPN:
- Once Raspbian is running on your Pi, go to Menu →Accessories →Terminal, and type:
sudo nano /etc/apt/sources.list
- A text editor will open, move the cursor to the end of the file and add the following code (if you are using the latest Buster)
deb [signed-by=~/opencpn/opencpn_key] http://ppa.launchpad.net/opencpn/opencpn/ubuntu/ bionic main
- Save the file by pressing Ctrl X, say Yes, and press Enter.
- Go back to the Terminal and type:
Sudo apt install dirmngr
- Make sure you are connected to the internet and type the following to update the Software sources:
sudo apt-get update
- Finally, type the following to install OpenCPN:
sudo apt-get install opencpn
Configure and Run OpenCPN:
- OpenCPN can be Run by typing opencpn in the Terminal or by clicking on the Application icon under Education.
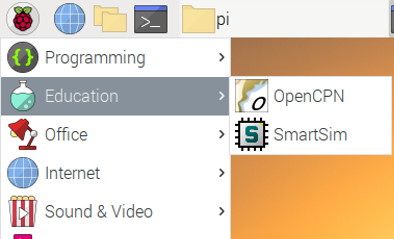
In OpenCPN, downloading and installing charts is how we get AIS and map views for a specific region. To install charts we can use the Chart Downloader tab.
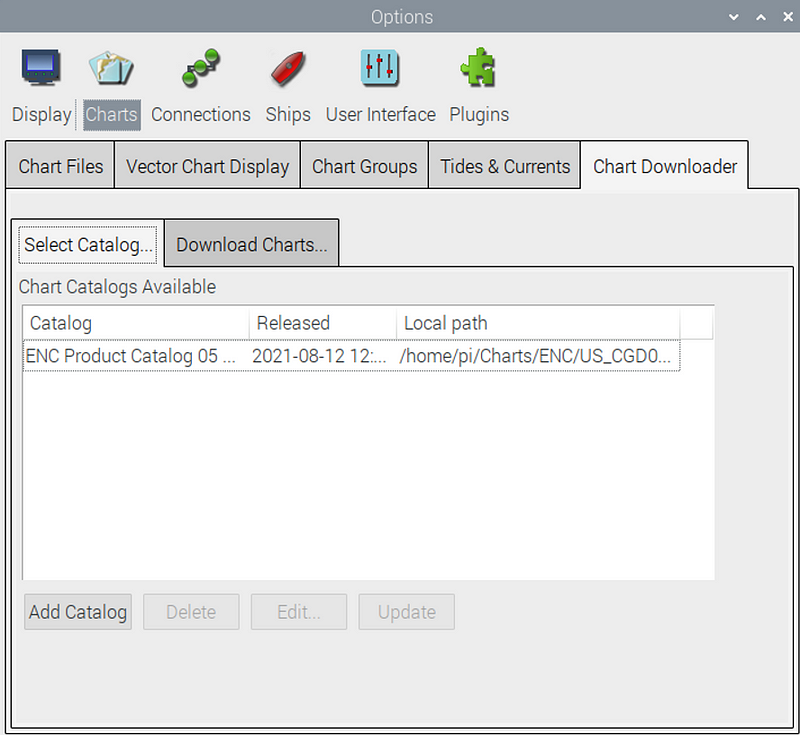
- Click on the Chart Downloader tab
- Click the Add button to see all the charts in the catalog and select one that interests you.
- Following the original guide, I chose USA NOAA & Inland Charts
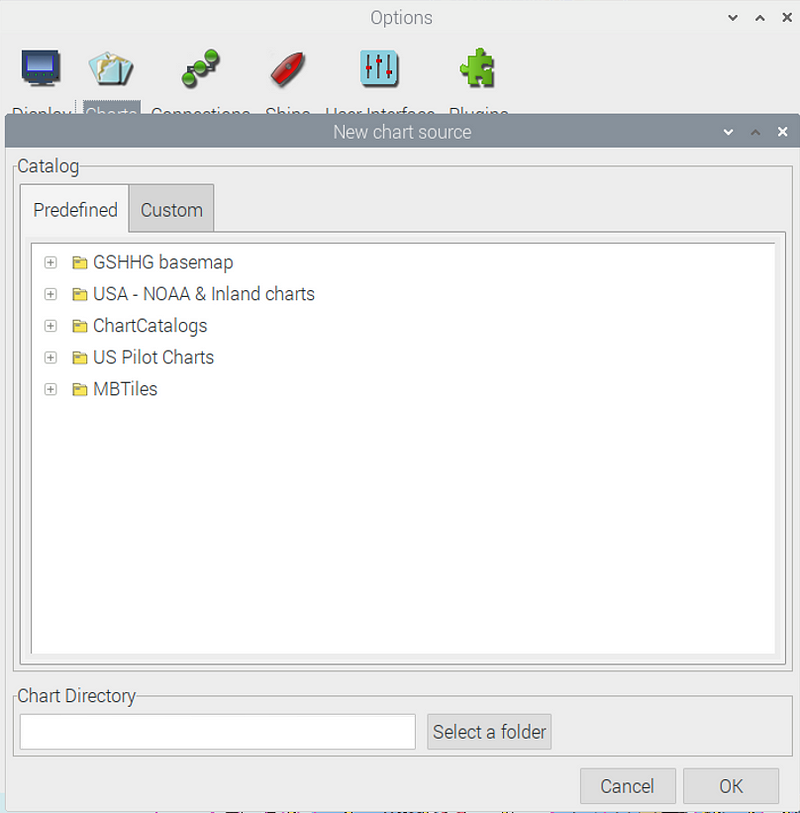
- Click OK to see more chart format options. In the case of the NOAA charts, they can be viewed by state, region, district, etc. I selected “by Region.”
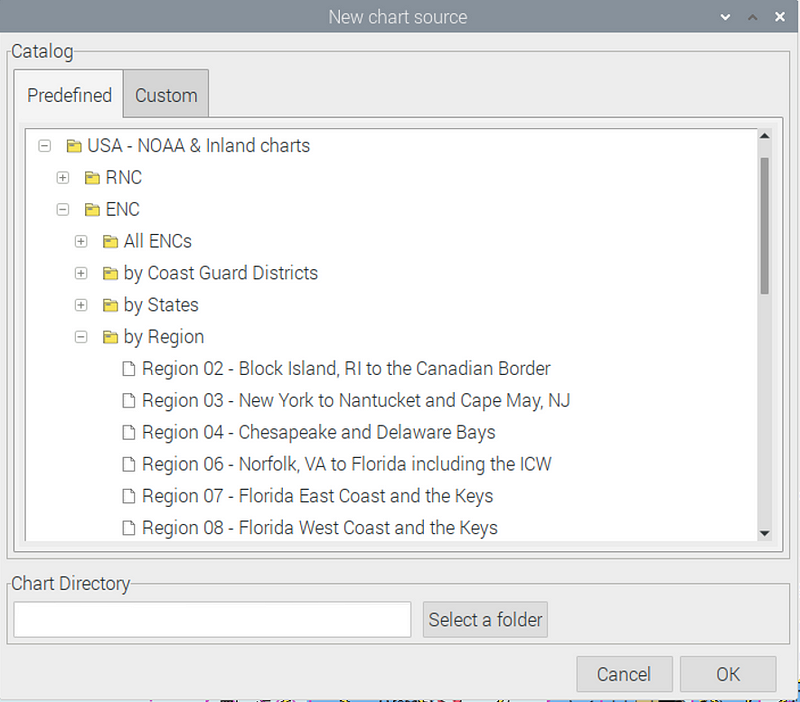
- Scroll down to select the Region you want to add, I selected Florida East Coast and the Keys
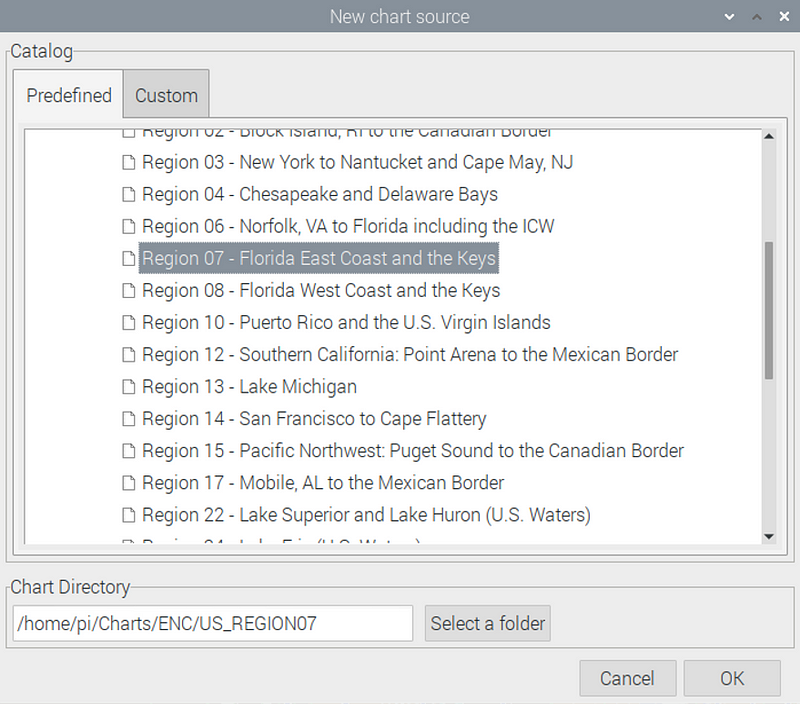
- Download the catalog into your directory by clicking Update.
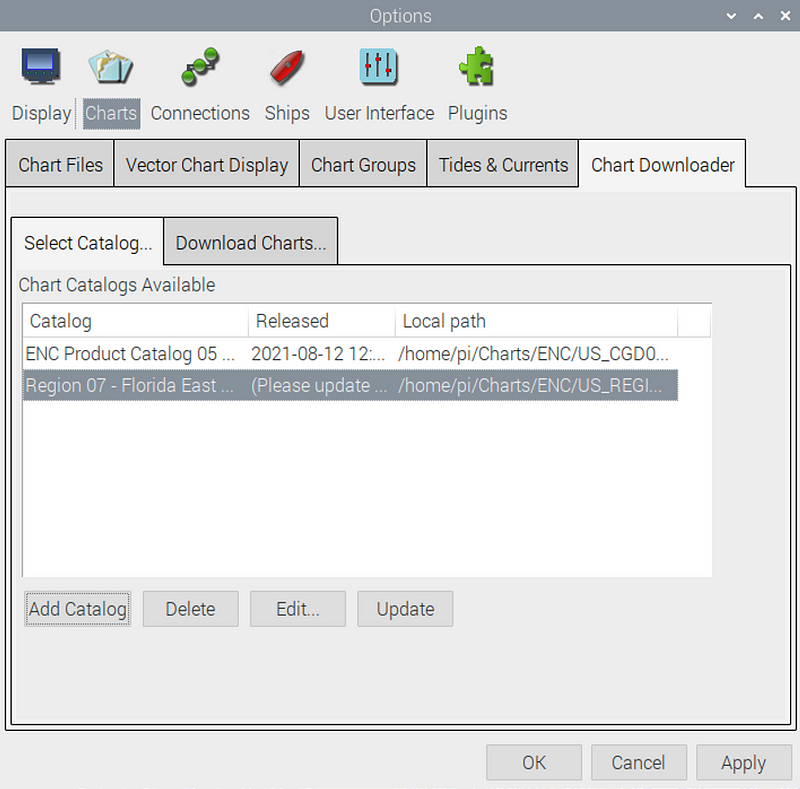
- This will populate chart names in the box below where you can turn off any you don’t need.
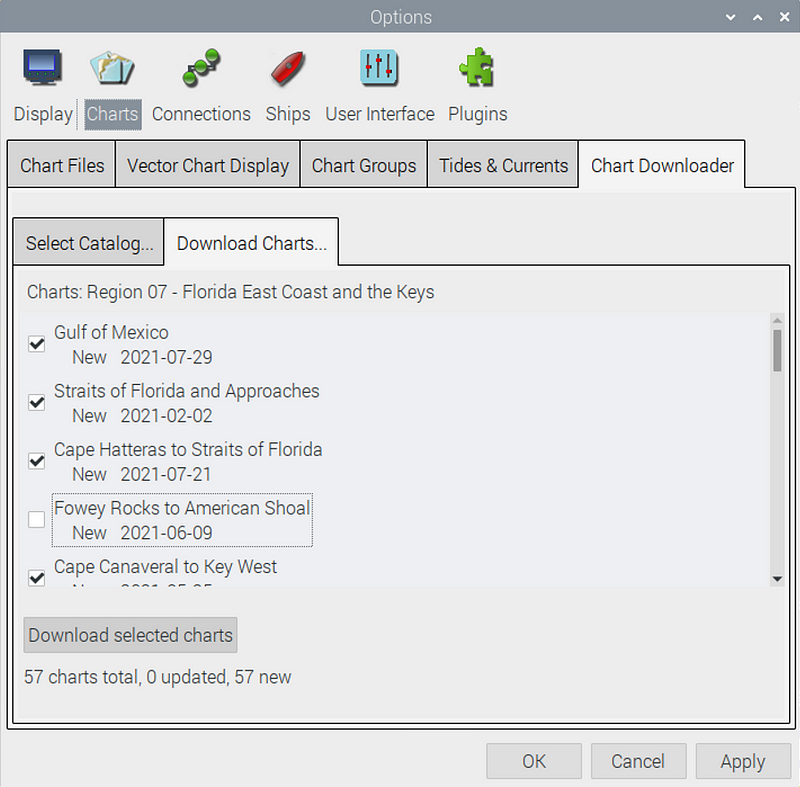
- Click the “Download Selected Chart” button
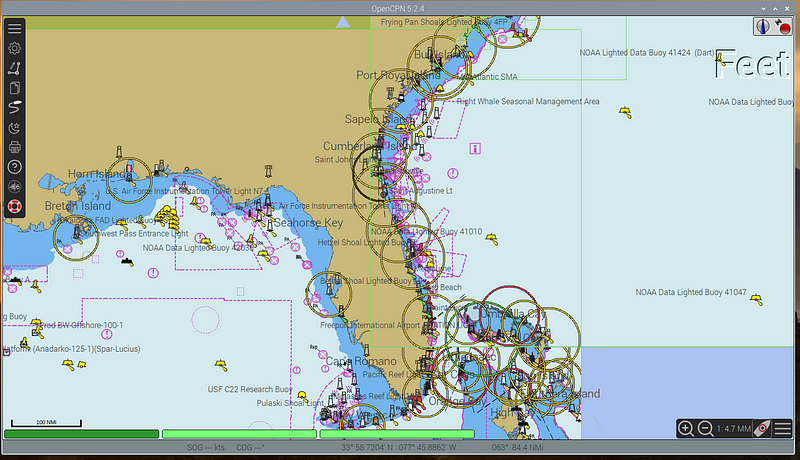
Configure your Data Source
- Click on Options
- Click Connections
- Scroll down and click Add Connection button
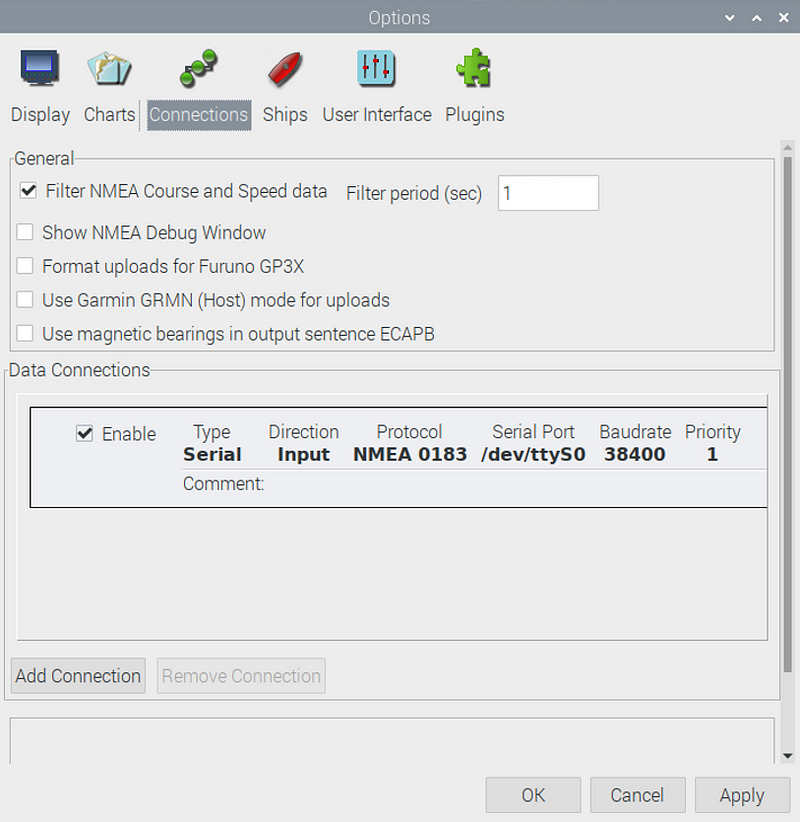
If you are using the dAISy Hat:
- Under properties click the Serial radio button
- Enter ‘/dev/ttyS0/ or ‘/dev/serial0’ in the DataPort field
- Select Baudrate of 38400 and click OK
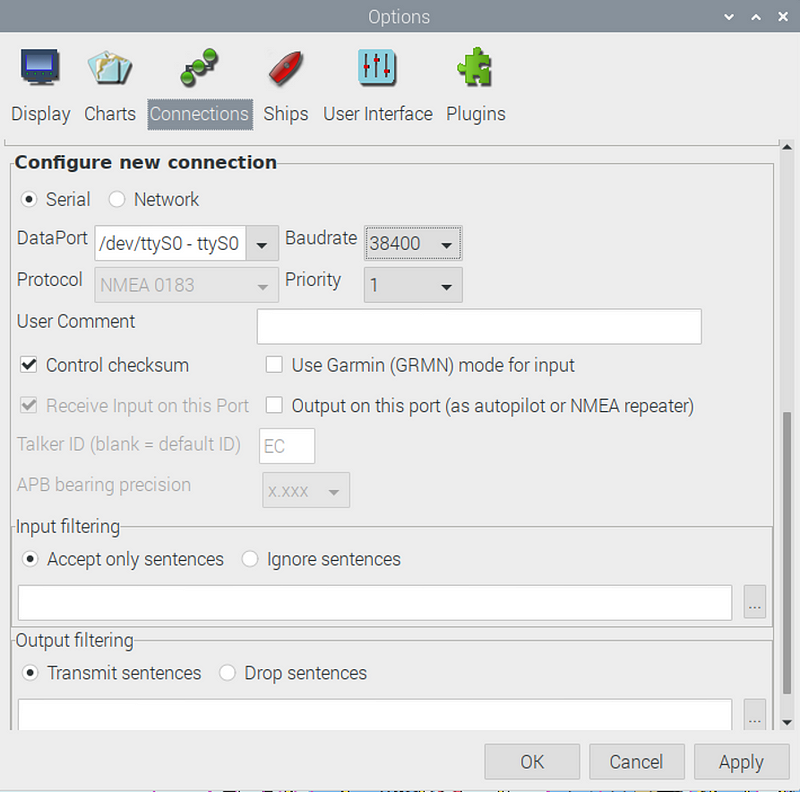
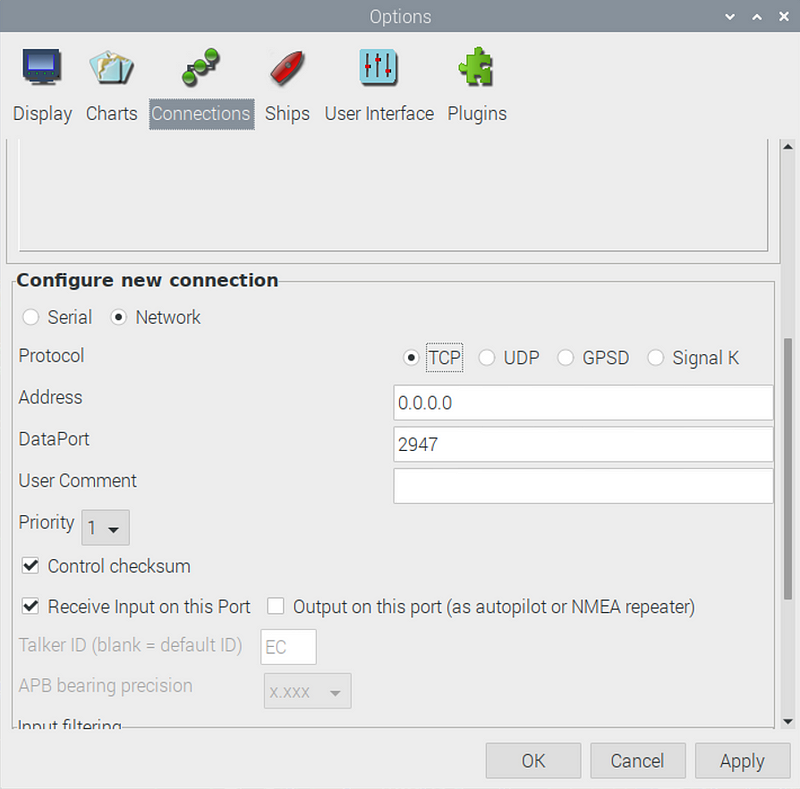
If you are using another device and getting your feed through the network:
- Click the Network radio button
- Select the protocol
- Enter your device IP
- Enter the protocol port number
- Click OK
To test your connection, click Show NMEA Debug Window to see the sentences transmit.
Using NMEA Simulator to generate sentences for AIS research
Because I am located over 10+ miles from a body of water, I will need to test OpenCPN with sample AIS data. We can simulate vessel movement and information such as speed and position based on data we provide by using the NMEASimulator.
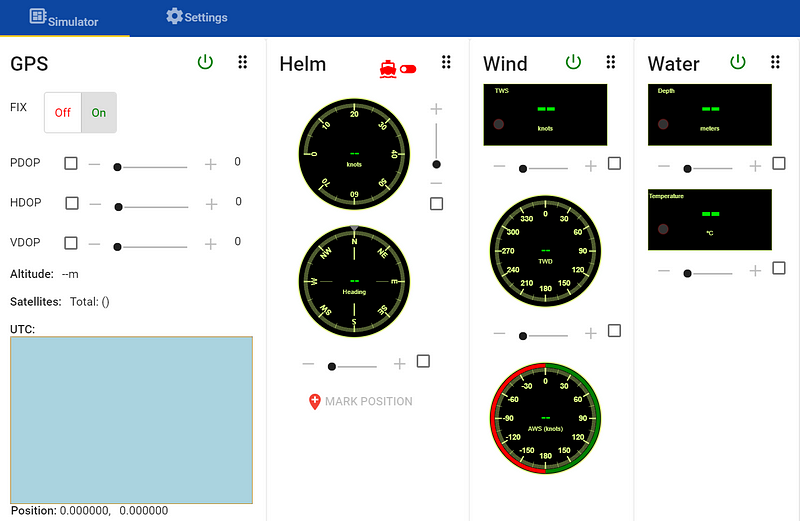
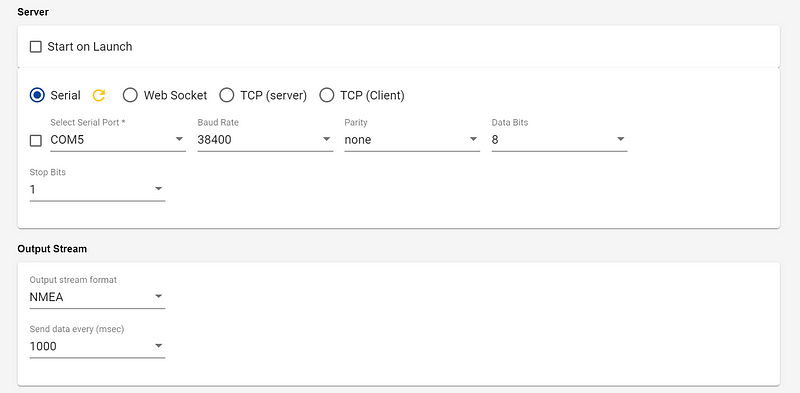
- To send the data to OpenCPN we need to enter the IP and listening port in Settings under the Server section.
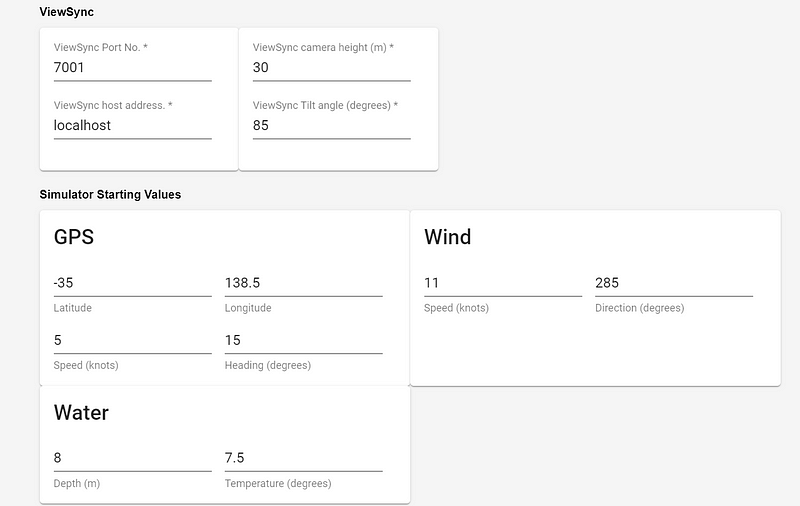
- Set up the simulated data in the Simulator Starting Values section
- Start OpenCPN and click the Play button in NMEA Simulator to view the simulated AIS data within OpenCPN!
I hope that you enjoyed this walkthrough and are able to create your very own AIS Pi with OpenCPN data. I had a lot of fun working through this project. A huge thanks to Gary Kessler for inspiring my original AIS Pi project and providing much of the data for this one. Be sure to check out his site for more info and projects in maritime cybersecurity.
Finally, a special thanks to @theprescomm for helping me figure out the errors in my Linux commands which were plentiful.